Data Artem
Help
Contents
Accounts
You do not need an account (a login ID and password) to browse data on this site.
Accounts are required to edit data. Registering for an account is by invitation only. If you have an account, your login ID is the e-mail address you used when you registered. Your e-mail address is not shared with anyone and is not displayed on the site.
When you register, you must also choose a short display name - and this is visible to other registered (logged-in) users.
Registration
Registration steps:
- You will receive a registration invitation link from the Data Artem administrator.
- Fill in and submit the registration request form.
- The administrator will be notified of your registration request.
- The administrator will activate your account and assign the appropriate edit permissions.
- You will be notified when your account has been activated.
Passwords
A password must be at least 10 characters long (but not longer than 50 characters).
The password must contain at least one character from each of the following 4 groups:
The password must contain at least one character from each of the following 4 groups:
- lowercase letter (a, b, c...)
- uppercase letter (A, B, C...)
- digit (1, 2, 3...)
- any other symbol (!, @, #...)
Search Functionality
Searching for an accented word such as église
is the same as searching for the unaccented equivalent word eglise
(and vice versa.)
Searching is case insensitive - that is, searching for Capital is the same as searching for capital (and vice versa.).
Wherever possible, search will attempt to find plurals of search terms, and will also attempt to find common stem variations - for example, it will find beginning when you search for begin.
If you enter multiple words into the search field, for example:
arcade pier
this will find all results containing at least one of the search words. This is the the same as using the "OR" keyword:
arcade OR pier
You can search for results which contain all the search words by using "AND":
arcade AND pier
You can search for a specific phrase by placing it in double quotes:
"south pier"
You can build more complex searches by using parentheses:
(arcade AND pier) OR porch
Data Artem's search is based on the Lucene text search engine. As well as the above features, it supports more advanced options, which you can read about in the Lucene documentation and also use in Data Artem.
All of the above search features supported by Data Artem are also supported in the Mirador image viewer bundled as part of Data Artem. See searching for images for more help.
Managing Images
- Adding Images to Data Artem
- Attaching an Image to an ICI Record
- Creating a Floor Plan
- Adding Interactive Areas to a Floor Plan
- Viewing a Floor Plan
- Viewing Data Artem Images using an IIIF Viewer
- All Images in Data Artem
- All Images for One Building
- A Single Image
- A Floor Plan
- Searching for Images
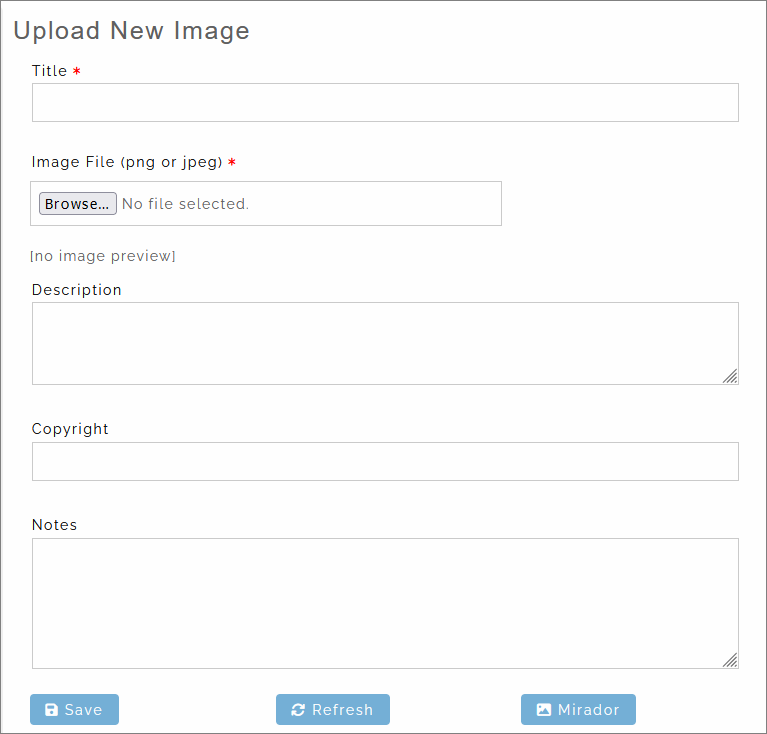
Adding Images to Data Artem
To add an image to Data Artem, the image file needs to be:
- Saved as a JPG or PNG file.
- No more than 5 MB in size.

Complete the new image entry form:
Once you have saved your new image, you can choose to attach it to an ICI record:
- Building
- Capital
- Face
Attaching an Image to an ICI Record
To attach an image to a record, navigate to that record.
If there are no images already attached to the record, you will see an "Add Image" tab:
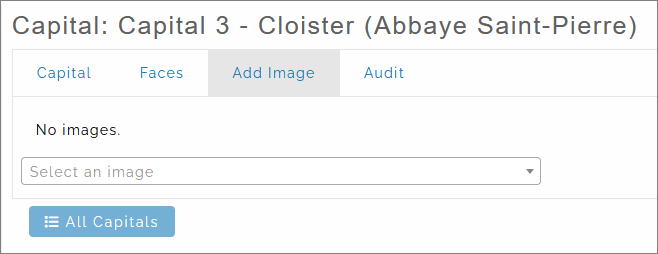
If there are already one or more images attached to the record, you will see an "Images" tab:
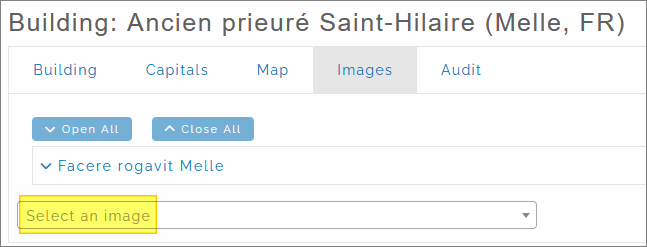
Use the drop-down list to select the new image you want to add to the record you are editing.
After adding a new image to a record, you can click on the main ("Building", "Capital" or "Face") tab of the record and hit the "Refresh" button to confirm that the image has been added correctly.
Creating a Floor Plan
A floor plan is an image with additional clickable elements: shapes which can be drawn on the floor plan, and which link to capital records (and the images attached to those records). This allows a floor plan to be an interactive view of a building's capitals.
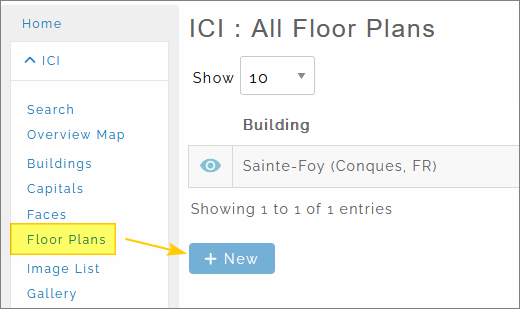
To create a floor plan, first add the floor plan image file in the usual way. Then follow the steps below, to set up the image as a floor plan.
Click on the "New" button
You will see the following form:
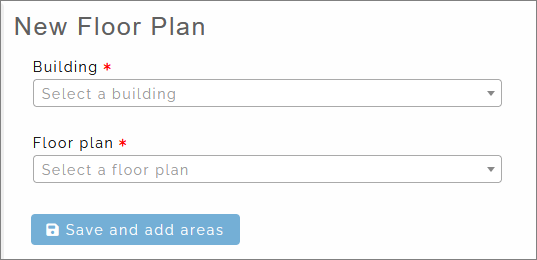
Select the required building record and the floor plan (image) record.
NOTE – the "Floor plan" list will show you all available images, so be careful to select the image for your floor plan.
Adding Interactive Areas to a Floor Plan
Click on one of the "New" buttons to select a rectangle or circle. The shape will be placed in the top left hand corner of the image. Drag and resize it to the required location in the image.
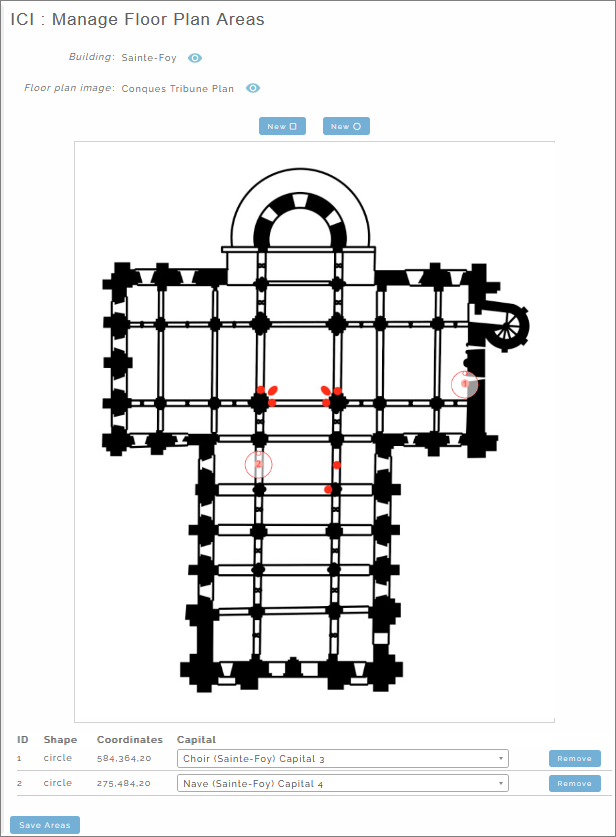
The above floor plan shows an image with two circular interactive areas drawn on it.
For each new shape you add to the floor plan, you will see a new record in the table of shapes below the floor plan image:
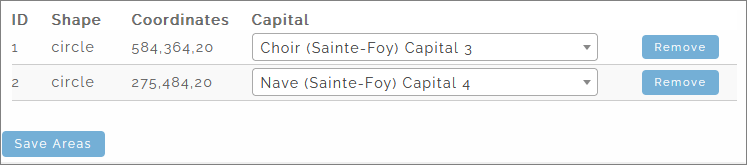
Use the drop-down to select which capital you want to link to your new shape.
Do not draw a shape onto the floor plan until you have created the related capital record for the building. You will not be able to save your changes if any of the shapes do not have a linked capital.
You can add (and remove) one or more images to (and from) the capital record at any time. The floor plan will display any images that are attached to each capital record, when the floor plan is viewed (see next section).
A capital record does not need to have any attached images to be used in a floor plan.
Viewing a Floor Plan
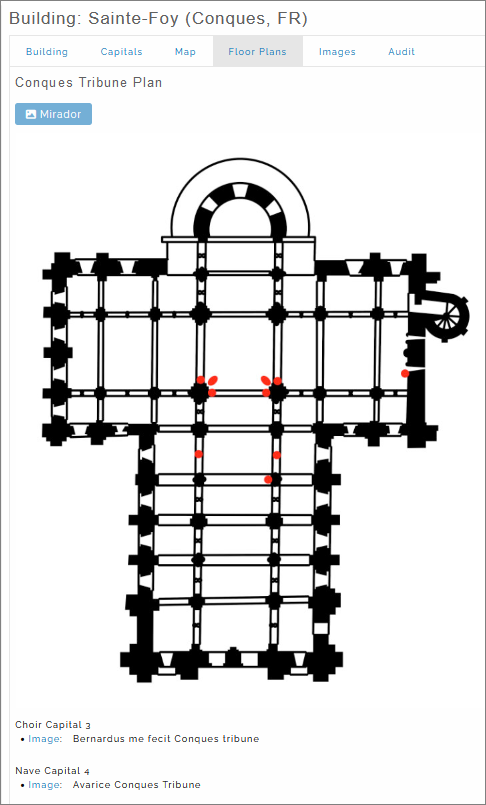
To view a floor plan and use its roll-over areas, open the related building record and click on the "Floor Plans" tab.
As you roll over the relevant area of the floor plan, it will be activated.
You can also see where the active areas are on the floor plan are by rolling over the image links below the plan.
You can browse through all of the images attached to all of the floor plan's capitals. Click on any of the image links to do this.
Viewing Data Artem Images using an IIIF Viewer
Data Artem supports IIIF open standards for displaying its images. This means that you can use any compatible IIIF image viewer to view Data Artem images.
All Data Artem manifests use version 3.0 of the IIIF Presentation API. Earlier versions are not supported.
To help with this, Data Artem has a built-in IIIF image viewer – Mirador – which you can use. This also gives you access to the related manifest URL, so that images can be opened in any compatible IIIF viewer - although Data Artem manifests have only been tested with Mirador.
Data Artem provides four different types of manifest:
- All images in Data Artem
- All images for one building
- A single image
- All images for one floor plan
All Images in Data Artem
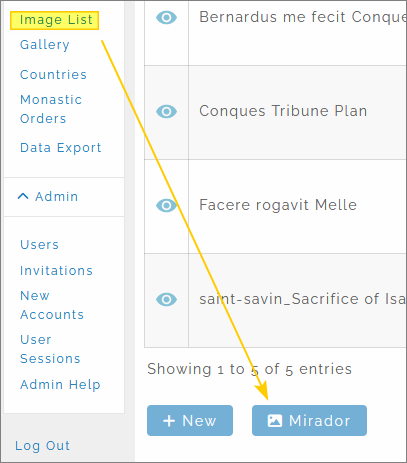
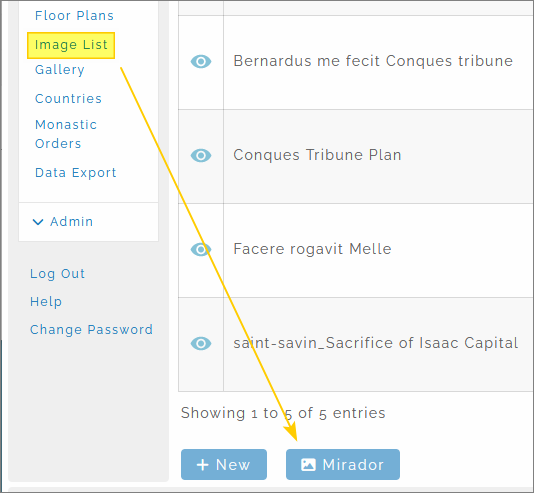
You can open every Data Artem image in Data Artem’s built-in Mirador viewer by using the link shown in the Image List page:
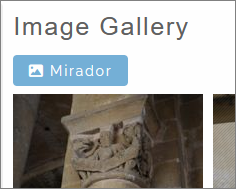
You can also use the link in the Gallery page:
The Data Artem Mirador URL is: https://www.dataartem.org/iiif/mirador/image/all
All Images for One Building
If there is at least one image associated with a building (for the Building record or for any of the building’s Capital or Face records), then you can open Mirador to show all the images for that building.
The link is provided in the main tab for the Building record, regardless of where the images are attached (to the building record, or to any of the building’s capital or face records):
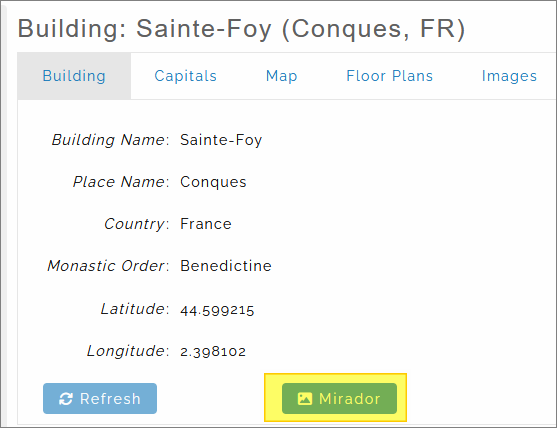
(This page will look different if you are in edit mode.)
NOTE: This collection of images will not include images associated with a building’s floor plan and its roll-over areas, if those images are not also attached the building record, or to one of the building’s capital or face records.
If you want a floor plan to be part of the building manifest, then add the floor plan image to the building record.
The Data Artem Mirador URL is: https://www.dataartem.org/iiif/mirador/building/{building_id}
A Single Image
You can open any single image in Mirador by using the link displayed in the main image record:
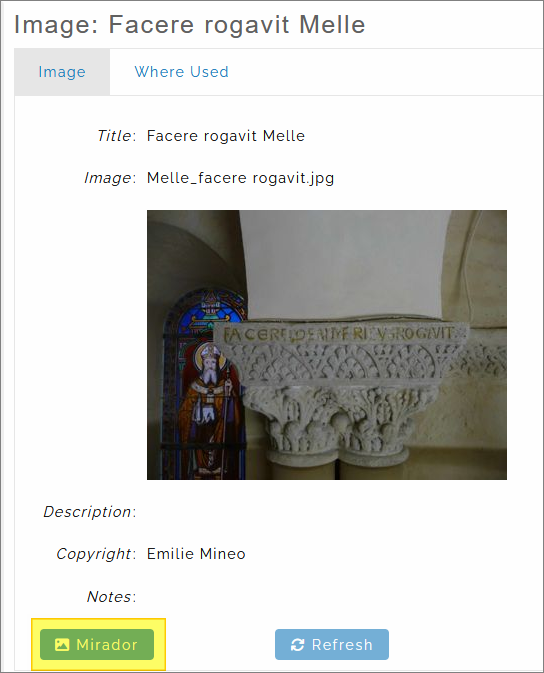
The above screenshot is based on a user who is not logged in to Data Artem. Logged in users will see a different layout, but have access to the same link.
The Data Artem Mirador URL is: https://www.dataartem.org/iiif/mirador/image/{image_id}
A Floor Plan
You can open any floor plan (with its linked area images) from the "Floor Plans" tab of the relevant building record.
When the floor plan image opens in Mirador, it will automatically use two side-by-side images:
- Left hand side: the floor plan
- Right hand side: linked area images
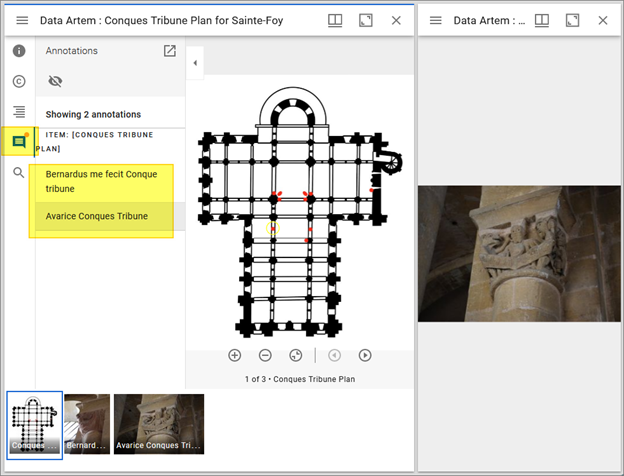
The sidebar will auto-select the "Annotations" view.
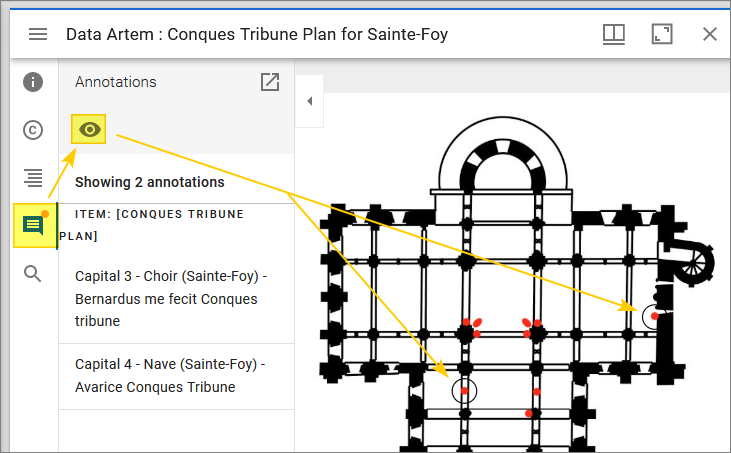
You can click on the list of annotations shown in the sidebar, to display the related image. The rollover areas in the floor plan are the same as those shown in Data Artem.
You can also click on the "Highlight All/None" eyeball icon to show/hide the related areas on the floor plan.
The Data Artem Mirador URL is: https://www.dataartem.org/iiif/mirador/floorplan/{floorplan_id}
Searching for Images
Data Artem supports searching for images:
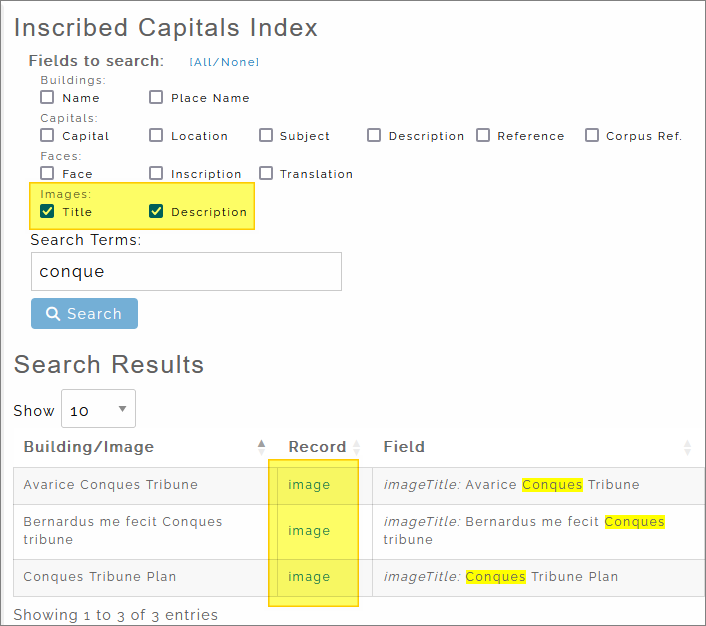
This same search functionality is also available in the Mirador viewer. Open the Mirador viewer, so it shows all images in Data Artem:
Then in Mirador, enter a search word or phrase:
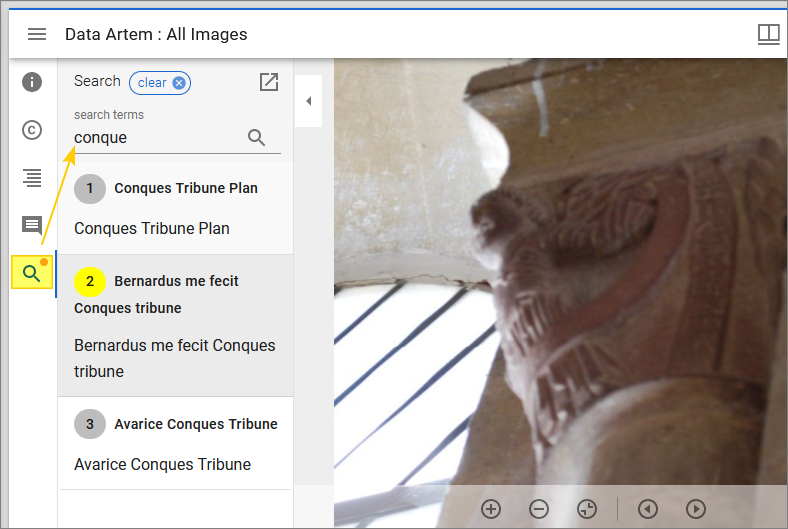
The search will only operate across the images loaded in Mirador. In the above example, this is every image in Data Artem. But if you have a subset of Data Artem images open in Mirador, then it will only search across that subset.
See Search Functionality for more help.